It's really close to being done. The stand is almost done and I have the tubing for the last 5 notes, I may get that done today, but I need to do some shopping.
So, when last we met, I was having trouble getting the holes drilled in my particle board. I would suggest using other wood for this, particle board is heavy compared to the same size in wood like poplar or even a piece of cut plywood. But I had this piece in my garage and it looked pretty so I went ahead and used it. I like that it's white and went with the pvc pipes.
The next morning, I had two very charged batteries for my cordless drill and got the other holes drilled without worry. The neighbor forgot to bring the corded drill over before he went to his job. So, the cordless worked fine. i did go buy a corded drill though, since my husband is doing a project that required drilling into concrete and my cordless wasn't going to do that!!
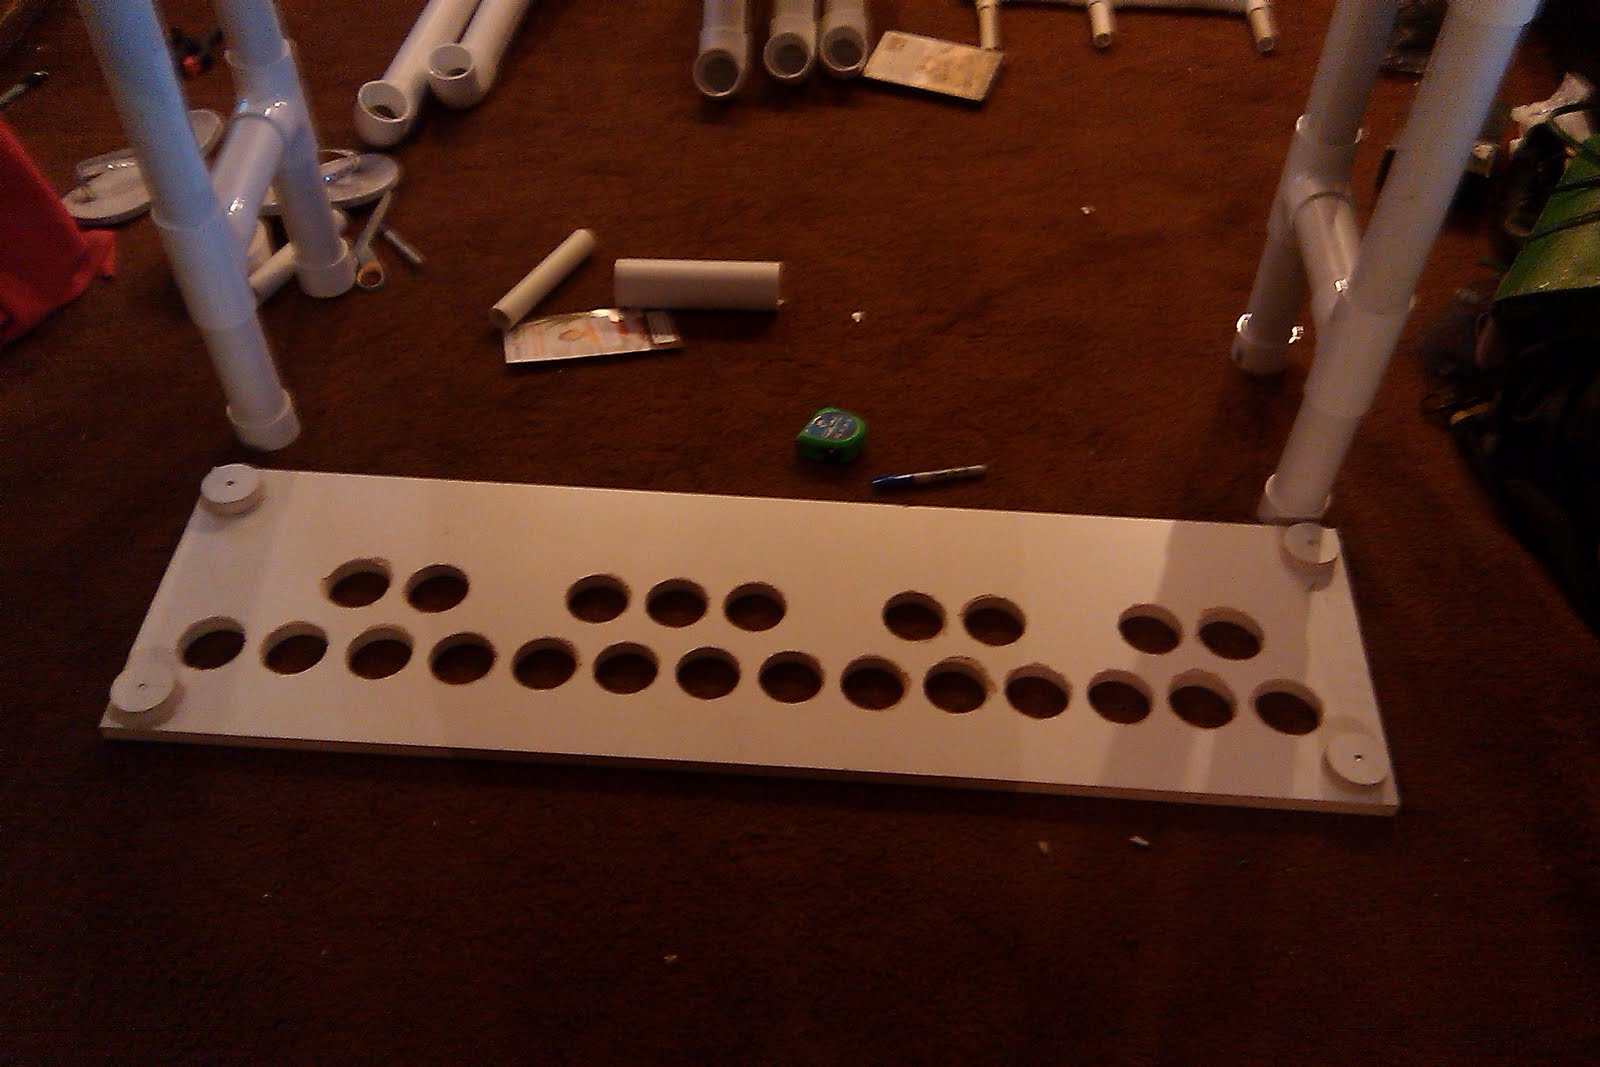
 You can see the holes here and you'll see this photo again since it shows how the base is going to mount onto the board. Pretty ingenious I think for using the circles that I cut out of the board.
After the holes were cut out, I got started on the base. I wanted nothing in the front, just the whole thing open so I wouldn't be fighting with the note tubes and everything could be seen well by the audience They people who will see this will be amazing and I think they should be able to see it clearly.
 Here you can see that as I started putting in the notes, the board began to bow in the middle. It was just a little bowing, but not all the notes were in and I knew this was going to be a problem so I put a middle vertical brace in the back.
 For the sides, it was fine and I have horizontal pipes near the top just to keep the legs steady and sturdy.

Side view of the base legs. I do need to say that I didn't do the math quite right and the high F touches the legs on the right side. It doesn't make the sound different BUT the tube doesn't sit flat on the top of the table. If I had it to do over (and I might) I would make the table top 6 inches longer (to 55 inches) and 1 inch wider to 15 inches. That way the notes could be 1/4 inch more apart and the legs wouldn't hit any notes. Nothing is glues yet so if I think it's a problem, I can always get another top board and redrill the holes for note tube.
So how does the top board fit onto the base legs? Well, let me how you! I'm actually pretty proud of the way I did it, it cost nothing and reused the circles that my drill bit cut out of the holes. I was looking for some way to use them and this hit me and I thought it was perfect.
The circles fit perfectly inside the couplings. So the circles are bolted to the bottom corners of the board and the top of each leg has a coupling. So the table just turns over and sits on the circles. I'll do this to the bottom board also, I just have to get that board cut, since it's a strange size. I may also make it slightly bigger so the bottom of the base is more stable. Here are some photos:


The progression of the way the circles are bolted to the bottom the board, I didn't want to use nuts on the bottom, the bolts are glued and circles are glued so there should be no problems later.
The cicles will be glued to the couplings when I find the perfect glue to put particle board and pvc together.
That big black thing is my dog Dee Dee
I also installed the vertical brace on that back as seen here:

It goes all the way to the floor for better support.
There is a circle and coupling set up on it too so everything is sturdy.
At this point the base stands 34 inches tall. It will be about 38 inches after wheels and that will be too tall. I will take some inches out of the legs to make the whole thing 36 inches tall with wheels at the end.
Sometimes you gotta make a few mistakes to get it right in the end. . .
So, after getting base mostly done, it was time to load it up with notes so the kids could play it. Like I said earlier, the F note touches the base leg and when the last note goes in at the left side it will touch too, but not as much. Those notes will also touch the bottom board. The lowest note I have will be about 65 inches, or 5 feet 5 inches.

The longer sharps at the top that sit horizontal have to be hung from the board and then all the hanging notes will have to be supported from each other. I used metal tape with holes in it and each tube screwed into the tape. It's a great way to make sure the notes don't bounce around or vibrate out of position.
 Sorry about the light coming in from the door. Here you can see the tape. It screwed to the under side of the board, folded over so the tape doesn't come loose, and then it comes down behind the tubes and each tube is screwed to the tape. I use 1/2 inch screws so they only go into the tube slightly. I don't know if a longer screw would make the sound different.
I did this in several places both vertical and horizontal to stabilize the tubes in different ways.
I too out the short tubes, had someone hold the longer tubes and used a sharpie to make where to drill inside the tape holes. I screwed each, one at a time, and checked how it hung before going on the next one. The biggest thing is to make them hand so the coupling on the top of the board are flat against the top.


When you build yours, use supports where-ever you think they will be needed. No such thing as too much support, in my opinion.
Here is what the instrument, fondly named Thumper, looks like today. I have 5 more notes and when I get those done I will add those photos here.
 All the metal supports have been wrapped in white duct tape so they blend nicely against the pipes.
So I still need to make the last 5 notes, put a board on the bottom with wheels and adjust the height of the whole thing and it will be done!!
Email me if you have questions or want to chat about Thumper I will make some videos of it being played and get them up here.
Thanks for looking! Have fun making your PVC Instrument.
Your method of explaining in the blog that’s superb I have now words to praise your blog.
ReplyDeletePlumbing Pipes
pvc pipe
Your blog is good information. We are Exporters of PVC Pipes over all India.
ReplyDelete